Today starts week one of our Organizing Paper Party! We are going to make a home for every piece of paper in your life. Each Thursday, we’ll focus on a specific type of paper.
Since this is a party, let’s start with the fun stuff, taxes. Wait, wait, don’t leave yet. This will be easy, I promise. We’ll take it one step at a time. I took another look at my tax files and created these steps to help get things in order.
Gather Supplies
There is really no right or wrong here. Know what will fit your personality style and choose what you will be mostly likely to use.
For the filer
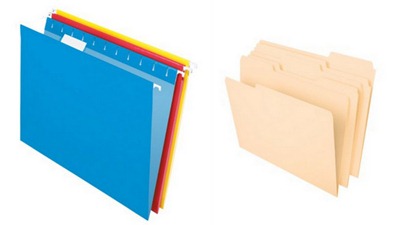
- Hanging files and/or file folders
 Supplies for the piler (as in makes piles of paper)
sources (clockwise): The Container Store | The Container Store | Amazon | Staples or Modulor | old shoe box
If you don’t have a file drawer with space for long-term tax storage, you’ll need to get something for your 7+ years of past taxes. See the last step for a few ideas.
Create a Permanent Home
Let’s focus on this year’s taxes first. It is important to have a place for tax papers you collect throughout the year. Otherwise, you know the story- receipts in piles stashed through the house earmarked as “I need that for taxes.” Then when tax time rolls around and you are searching for all those papers you “just saw.”
Taxes are stressful enough. Your permanent home for your tax file, whether a box or file, doesn’t need to be complicated. A small document box can work great or open basket close to where you process mail and paperwork. Keep it simple. Don’t forget to give the container a generic label like “This Year’s Taxes” so you won’t have to worry about re-labeling it every year.
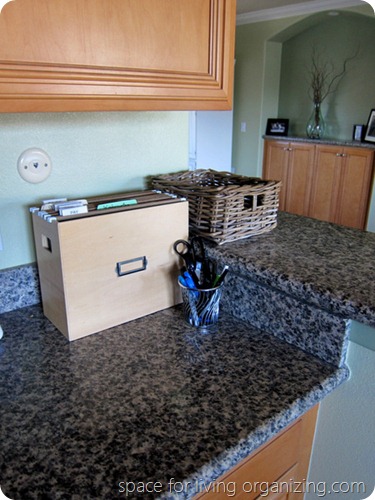
What works for me is to have a desktop file box in the kitchen. I call them my action files. I have a To File section where I throw everything in that needs to be filed in my reference files, whether it’s paperwork for taxes or auto repairs. (You can read all the details of how I use my action file system here.)
Monthly, or in reality every other month, I file everything from the To File file in the reference file drawer under my desk.
I don’t even whip out my label maker. I keep filing super simple so I am not procrastinating to make everything perfect, with coordinating color and font.
Decide What to Keep
You will want to consult a professional on what paperwork to collect. I can only share what I keep for my taxes. Your needs might be different. When it comes to taxes the old saying “better safe then sorry” rings true. Here is the short list of documents I collect throughout the year.
Paystubs to cross check the year-end W-2
Receipts for deductions including but not limited to
- moving expenses
- college expenses
- medical and dental expenses
- childcare costs
- auto registration
- Donations to charities and churches
The other important tax forms trickle in at the beginning of the year. During that time I move my tax file from my reference files to my action files since it has now become a current project. This make it easy to slip in the various forms as they come in the mail.
I quickly thumbed through my old tax files. I found I was keeping lots of needless paper. I lightened my tax files by-
- Recycling any envelopes or generic pamphlets.
- Laying every piece of paper flat instead of keeping it folded because it takes up less room.
- Shredding monthly statement if there was a year-end summary that would suffice (for example investment and donations statements).
Don’t Forget Your Digital Files
If you’re like me, many of my receipts arrive by email. The last thing you want is important documents buried or accidently deleted. I have an email folder labeled Taxes (I like the email folder to be labeled without the year. You don’t want tons of folders or it starts to become too complicated). Transfer every tax related email into that folder.
If you set up Gmail Labs, many times Gmail does it automatically, which is particular wonderful.
After a quick search at tax time, I print out anything I need to keep in the permanent tax file and have an email copy for backup. This system is so easy many times I email myself records just so I can have a backup.
Creating Long-Term Storage
Now that we have this current year in order, what do we do with the past 7 years of tax files? Time to make a reference file drawer or box if you don’t already have one.
Even if you didn’t choose filing as your organizational system of choice in step 1, files are really the best choice for long-term storage. I know you might hate filing but this is the most practical way to store paper (and remember, you’ll only have do this once a year).
If you don’t have room in the back of a filing cabinet or don’t even have a filing cabinet, grab a simple bankers box, document box or portable file box to create long-term storage.

source (left to right): Amazon | Amazon | The Container Store
You can stash the box in the back of a closet, garage, basement…anywhere it is easy to access once a year and safe from damage (if your basement floods every year don’t keep it there!).
My reference files live underneath my desk which keeps me limited on space. I don’t want it cluttered up with old tax files that I may need to access rarely if ever. I keep the current year and last years return in the drawer. But years 7 through 2 are in a portable file box tucked up in the closet.
We are far enough away from tax time to make this the perfect time to get things in order rather then waiting until the hectic tax season.
Ready for your turn? I can’t wait to see how you get all your taxes in order. Even a little bit of progress counts, tax files do not have to be picture perfect!
*Since the Organizing your Paper party has already wrapped up; you can browse any week!


I LOVE it. You are so detailed. What a great step by step example! Thanks for blogging about my book!
🙂
Lisa
I’m loving this series, Autumn. Thanks for all your hard work ~ Keep it coming!